You want to install glass tile but you know that cutting it can be a challenge. Yes, more of a challenge than cutting regular old ceramic tile.
Additionally, the average DIY’er may not have the right equipment and may not know the tricks for how to cut glass tile.
I have a post on getting smooth tile cuts but glass is even fussier and needs even more attention. These tips- how to cut glass tile- are assembled below and demonstrated in the video (also below).
Why cutting glass tile is more difficult
What makes glass tile hard to cut is that you can see through it. Hence, this makes any imperfections plainly visible.
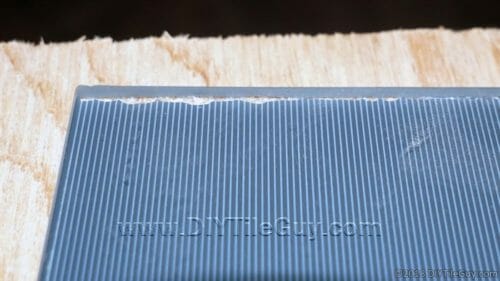
Many glass tiles are clear throughout and have a coating on the back which gives them their color. This coating can chip off and become jagged from cutting on a wet saw (tile saw). Commonly, this will show when viewed from an angle.
Below are 7 tips on how to cut glass tile. You will have to pick and choose which ones are applicable to your scenario. For example, many tile saws don’t have the plunge feature which will limit some of the options.
Additionally, many DIYers have the more budget-friendly “table saw” type tile saws and will have to adjust the concepts to fit.
For example, Tip #1: Cut the glass tile upside down will mean cutting it right-side-up on a saw where the blade comes up from below.
Bonus! Check out my bonus video at the bottom which shows a new technique not included in this video!
So, let’s get into it! Here are the 7 tips on how to cut glass tile.
How to Cut Glass Tile
1. Cut upside down
The rationale for cutting glass tiles upside down is that the glass tile blade will cut the coating on the back first. Since the rotation of the blade means that it’s entering through the coating the “blow out” would be on the glass side.
Yes, I understand that this means that the front side of the glass will have the rougher of the two cuts. But if the front side can be sanded, or filed down, so that it’s smooth then this will provide a better-looking cut.
If you’re cutting glass tile that is a solid color with no backing you’ll want to ignore this technique and cut it the “normal” way.
Thinset Decoded: Which Thinset to use | Infographic
2. Don’t drag the rolling saw cart back through the glass tile after cutting
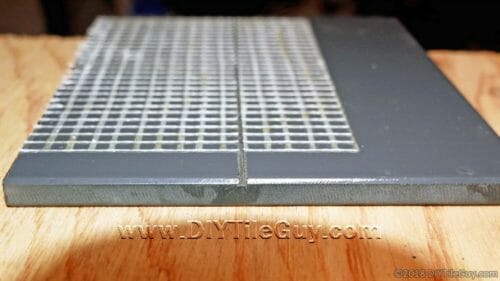
This is a similar concept as above. The more that the blade comes into contact with the coating the more likely you are to chip the coating and have flaws show through to the front of the tile.
When cutting glass tiles, it’s common to push the tile through the saw blade and then pull it back before shutting the tile saw off. But, using this technique, you would only push it through and then turn the saw off and/or separate the tile before pulling the rolling tray back.
This prevents the saw blade from coming into contact with the glass tile and helps to prevent further chipping of the glass.
3. Use a glass blade
It’s common for people to think that a glass tile blade is simply slick marketing. Oftentimes, people wonder whether, or not, a glass blade is necessary.
Well, I’ve tried cutting with and without a glass tile blade and I will vouch for the usefulness of a glass blade for cutting glass tiles.
It’s absolutely true that you may not need a glass blade for your purposes. A regular porcelain tile saw blade will cut glass tile and some even do a pretty nice job with it.
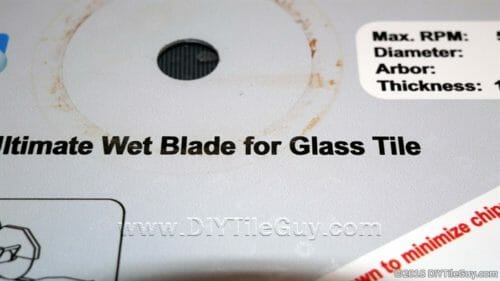
However, my personal experience is that a glass tile diamond blade does a nicer job than a regular tile saw blade. Glass tile blades have finer and softer diamonds that make for a smoother cut.
Hence, it will take longer to push the tile through the saw with a glass tile blade but the results are usually for the better.
What kind of grout do I need? Stain Proof edition
Let me throw a disclaimer in here: As always, your results may vary and will depend on which material you are cutting and which glass blade that you’ve selected.
Glass tile blades can be priced anywhere from inexpensive to $300+. Currently, the most expensive blades are resin-based and produce good results but are usually quite finicky, wear out quickly, and are fragile.
4. Cut beginning and end before the middle
This technique not only works for cutting glass tile but will work with any porcelain or ceramic tile. If you find that you are having an issue cutting through the tile only to have it break at the end- this technique is for you!
The idea is that you start the cut, then skip to cutting the very end of the tile- closet to yourself. Finish by cutting the middle.
Typically, when cutting a tile, the blade puts a bit of stress on the tile- which can lead to uneven chipping of the tile at the very end of the cut. By cutting the end before the middle you can reduce the stress and better control how, and more importantly where, the tile breaks.
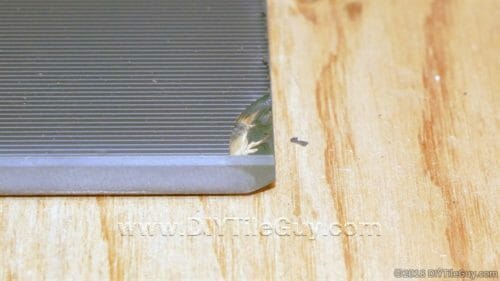
It’s not unusual for a tile saw to cut a little out-of-square nor is it unusual to have a blade wander, or pull, in the cut. This creates pressure on the tile which causes it to break at the very end of the cut and chips the corner.
Watch the video to see how to execute this technique.
Trowel Size Matters: Which notched trowel do I use for…?
5. Score upside down; then turn over and cut
This technique produces the best and most consistent results for clean, chip-free cuts in glass tile. However, it does require a plunge feature with a tile saw.
You’ll have to set the guide (sometimes called a fence) so that you can ensure that you cut in the exact same place on the tile.
Start placing the tile upside down on the rolling cart then loosen the knob on your tile saw that allows it to plunge up & down.
Next push the glass tile through the saw while allowing the blade to lightly score, or almost “float”, over the back of the tile. This will allow the blade to score through the coated backside of the glass tile.
Then flip the tile over and set it next to the fence again. Secure the plunge feature on your tile saw so that it’s permanently plunged.
Then push the tile through so that it cuts in the exact same place as the original score cut from the backside.
This gives a nice, clean result.
6. Score & snap
This may seem low-tech and maybe even outdated but cutting glass tiles with a snap cutter yields fantastic results! The jagged edge seen in the photo above doesn’t happen. What you’ll get is a clean cut.
However, the score & snap method has its major drawbacks: you can’t trim a sliver of glass off the edge. In general, the cut needs to be about an inch or more in width. Another drawback is the inability to cut a notch out of the tile. If you need to do anything besides a straight cut then this isn’t the tool for you.
Additionally, snap cutters are a you-get-what-you-pay-for item. Good score-boards can run as much, or more than a tile saw. And they don’t even have a motor. Nonetheless, these are a good option for limited uses.
7. Round your notches
It’s almost inevitable that you’ll have some sort of notch cut to make. Especially if you are installing a kitchen backsplash. Trying to navigate through the myriad of cabinets, windows, and outlets makes for plenty of notched cuts.
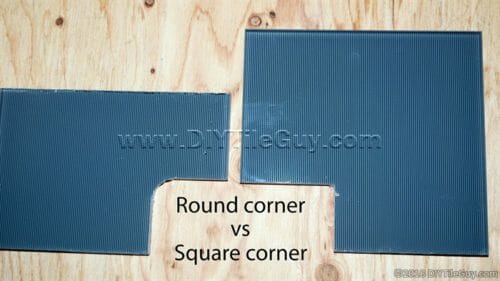
The problem is that a notch, or L-cut, is a crack waiting to happen. I would encourage you to avoid these types of cuts if possible. But if an L-cut (or U-cut) is necessary my advice is to round the inside corner(s) as much as possible.
A squared 90 degree inside corner is highly likely to crack. Any flexing of the wall makes that corner a weak point. It may not crack when it’s installed but it oftentimes will crack down the road.
Rounding the inside of the notch isn’t guaranteed to prevent a crack but it does lower the chances of it happening.
Bonus Video
The above video shows a combination of techniques that were all required to get a good cut with the particular glass tile that I was cutting.
So that’s my 7 tips on how to cut glass tile. If you’ve got some tips for cutting glass tiles that you want to share please leave them in the comments.