Flood testing a shower pan. I get several calls per year about showers that are leaking.
Some of these showers leak after just a few years, and some just a few weeks after they’ve been built.
I estimate that those calls could probably be cut in half if this one simple step were taken: performing a flood test and checking your shower for leaks before it’s tiled.
Estimated reading time: 15 minutes
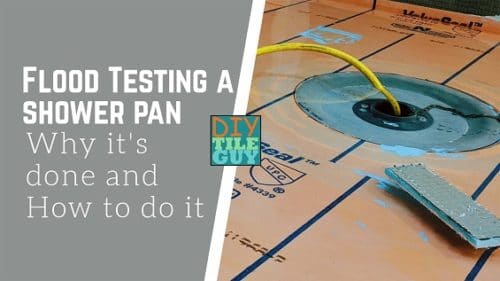
Table of Contents (click to expand)
What is flood testing?
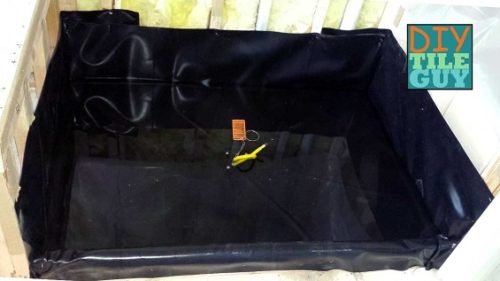
Very simply, a shower pan flood test involves plugging the drain of the shower and filling it with water.
If the water holds that level for 24-72 hours or longer, you don’t have any shower pan leaks. This is considered a successful test!
However, a test would be considered unsuccessful if the water level doesn’t hold. Why didn’t the level hold? Where did the water go? We’ll get to this below.
Additionally, the test should be conducted before the tile is installed. In fact, it should be done after the shower pan waterproofing has been installed.
Why is flood testing necessary?
The reason why one does a flood test may seem obvious, but you would be surprised at how many tile installers and tile shower builders don’t do them.
Additionally, it’s not just bad installers, either. I’ve known some very good installers who do not like to do a shower pan leak test.
Here are some of the reasons for not flood testing a shower that I hear from time to time:
Common excuses objections to doing a shower pan leak test
“Waste of time”
This is probably the number one answer. Yes, flood testing usually takes more time, and the entire process can take a significant amount of time, especially if an inspection is required.
The shower waterproofing has to be installed. Before being exposed to water, a certain amount of time must pass. This will depend on the type and brand of the waterproofing system, but typically, it would be ready the following day.
Then, the shower is filled with water. If your municipality requires an inspection, it will be scheduled at this time.
From here, more time will need to pass to allow the water to find a way out. Usually, overnight is a minimum amount of time, and more if you are waiting for the pan test inspection to get approved.
Consequently, this whole process takes a minimum of a day and can add several days onto the schedule.
It’s nice if the installer can work on something else in the meantime, but if it’s just the shower, there’s nothing that can be done except wait.
Contrast this to simply moving on to the next step immediately after the waterproofing is finished and I will concede that the flood testing process takes more time.
“I followed the instructions, so I don’t need to check it”
*Sigh* No doubt, this excuse is given by the tile installer that doesn’t test and “has never had a problem.”
Guess what? Checking one’s work is not an unreasonable requirement. In fact, it could be taken as flattering in that it means that what you are doing actually matters.
Airplanes, automobiles, plumbing, and gas piping are all examples of industries that check their work and have third-party inspections.
Besides, even if everything was done perfectly, there is always the chance that the products you use for waterproofing are flawed.
I’m scared it’ll leak!
This may seem like a bizarre objection, but it must be considered from the installer’s standpoint.
Putting 60 gallons of water in an upstairs shower and leaving it overnight can be a bit nerve-racking. You would hate to come back the next morning and see water dripping into the finished kitchen below.
So, not testing is almost understandable until you realize that if it leaks now, it will leak in the future, and it’s much cheaper and easier to fix before it’s tiled and the shower glass is installed.
Is flood testing required?
According to the Tile Council of North America, flood testing is recommended but not required. However, they acknowledge that the plumbing code may require it.
Additionally, in some municipalities, a shower pan test inspection is required. The only way to know would be to check with the building authority for your area.
But, even if an inspection is performed it can provide a false sense of security.
Flood testing falls under the plumbing code, and the inspectors know plumbing quite well. But when it comes to shower pans, they are generally less well-versed in the details.
Furthermore, add in all of the different products and methods that are common now, and it’s understandable that it would be difficult to keep up with what’s OK and what’s not.
How to do a flood test
After the primary waterproofing membrane is installed and has time to dry, the first step is to plug the drain.
Drain plugs for flood-testing shower pans
As a rule of thumb, tile shower pans have a 2-inch drain. There can be exceptions to this, but most showers will have a 2-inch drain. So, you’ll need a 2-inch shower pan test plug.
The “Wingnut style” test plug
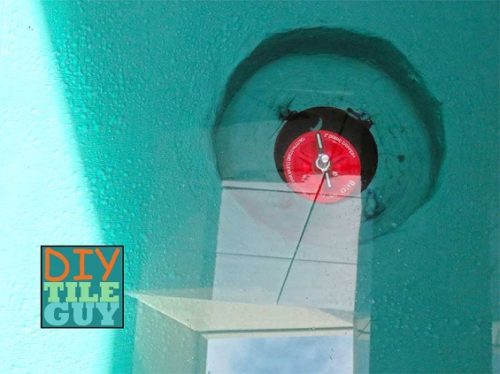
I’ve tried many different drain plugs. The least expensive is the kind that has a wing nut on the top. You tighten the plug until it seals.
In my experience, these are reasonably tough to tighten. It might seem simple until you get the plug recessed down into the drain and have to tighten it quite tightly.
I have more than once shown up the next morning to find that the water in the shower pan was completely gone because I didn’t have the drain plug tightened quite enough.
Inflatable test plug
The 2-inch inflatable test plug is the easiest, but it costs a little more than a mechanical test plug. Additionally, it’s nice to have the extension hose to get the plug far enough down the drain and still be able to put air in it.
Did I mention that you want to check the waterproofing of the shower pan and the drain connection? The drain-to-drainpipe connection is about 2-3 inches down inside the drain.
This type of plug is the easiest to use and gives the most reliable seal. I keep a Dewalt 20v battery-powered inflator in my van to pump up the plug, but any compressor will work—probably even a bike pump.
Fill it up with water
When the drain is in, you can begin flooding the shower pan with water. Hence the term “flood test.”
This step is basically as simple as it sounds.
Showers with curbs
You want as much water in the shower pan as possible, so this means filling it up to just barely under the curb’s level. Don’t overfill; just get the water to as high a level as reasonable.
“How do I do a shower pan flood test on a curbless shower?”
You just had to ask, didn’t you? Flood-testing curbless showers are not nearly as much fun.
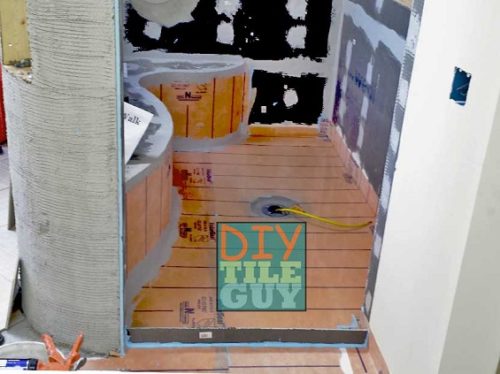
A flood test is a critical step in building a curbless shower.
To properly perform the test, you’ll have to create a temporary waterproof dam to keep the water in the shower wet area and raise it to a level high enough to test every corner.
I know of two different ways of creating this dam:
- spray foam
- Foam board and sealant
Both methods have their quirks. Spray foam is no fun when you’re unfamiliar with how it expands. However, if you do understand its expanding capabilities, it’s probably the easier of the two methods.
Simply spray a small strip of foam around the area that you want to contain. Wait a couple of hours for it to dry, and you should be ready to go.
Another way I’ve done it is to use a strip of waterproof foam board, such as Wedi board, and glue it down to the waterproofing with the sealant for that particular board.
You may have to put some weight on the back of it to prevent it from falling back, but this has worked successfully for me in the past.
Removing your temporary flood-testing dam
Additionally, you’ll have to be very careful when removing the temporary dams. They will be stuck directly to the waterproofing, and you don’t want to damage them after you’ve conducted your test.
You can carefully remove the sealant or foam residue with a flat scraper. It’s not necessary to get every bit of it off, but you do want the area to be flat again before tiling.
Monitoring the water level during a flood test
Next, you need a way to monitor the water level. You can mark a line on the side of the membrane with a pencil.
Another way is to measure the water in a particular and identifiable spot. I have a spot on the drain collar that I measure off of every time. You could also mark an “X” on the shower pan somewhere and measure off of that spot.
There’s more than one way to keep track. What matters is that you have a way to monitor the water accurately.
What if the water level has dropped?
If you come back the next day or several days later, and the water level has dropped, you must figure out why.
Here are the reasons the water level may be lower (or gone)
The drain plug didn’t seal tightly enough
This is the number one culprit for me when the water level is lower. Something happened with the plug.
When the water from a flood test is completely gone, this is almost certainly the problem.
But this could still be the reason for a slightly lower water level.
The fix is to reseal the plug or get a different one.
It’s leaking at the drain-to-drain pipe connection
You can check this by only putting enough water in to cover the seal in the pipe.
If this fails, then that connection will have to be redone.
It’s leaking at the membrane-to-drain connection
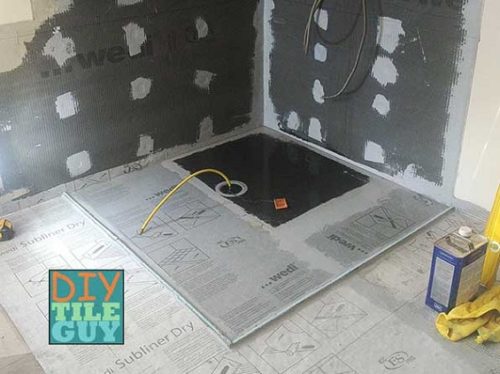
I’ve found this to be more likely with the Wedi showers. If the drainpipe isn’t installed correctly, the Wedi system will leak at that connection.
Additionally, if a traditional shower liner is used, then the problem would usually be the sealant (or lack of) underneath the liner where it seals to the drain.
One tip is to fill only enough water to immerse the drain and see how it holds. If it holds, then fill it up the rest of the way. This is particularly effective with the Wedi system or similar that I mentioned above.
It’s leaking at a membrane seam or corner
This can be diagnosed by filling the water level up to just past the suspected seam. If it leaks then the water level will drop to the point of the leak and then stop.
Wherever it stops is the problem and will have to be repaired.
The membrane has a hole in it somewhere
It’s a very similar situation to what I wrote above, but the difference is that you have no idea where the hole would be. You’d have to wait until the water level stops dropping.
If water is leaking downstairs during the process, it might be a better choice to remove what you’ve done and start over.
Evaporation
This is often used as an excuse when the water level is down anywhere from 1/16th to 1/4 inch. It’s an easy conclusion that has the benefit of no accountability.
In my experience, evaporation has never been the cause of a dropped water level.
Several years back, I had a flood test on a new construction project in the middle of summer. I had filled the shower liner up the day before a three-day weekend.
Furthermore, someone had left the furnace running the entire weekend, and it never shut off. At this point, it didn’t have a thermostat installed, and someone directly connected the wires to it, so the furnace ran all weekend with no way to shut itself off.
So, I’m saying that the house was extremely hot and had been for over three solid days.
Yet, my water level was right on the money.
An evaporation control
If you do feel that evaporation might be a factor in your flood testing, you should have a way to account for evaporation in your test.
You do this by having a separate container for water outside the shower. This container can be a bowl, bucket, or whatever you feel is safe and leak-free.
Then monitor the levels of both the shower and your container of water.
If your shower water level is down 1/8 inch, then the evaporation control bucket should be used too.
Other culprits
On one project, I discovered that the painters were stealing water from the shower pan. If you can’t figure out the mystery, consider who else is on the job and how accessible water is for them.
Draining the water when a flood test is complete
You’ve installed the waterproofing, plugged the shower drain, filled it with water, monitored the water level, and feel comfortable that the shower waterproofing is sound.
You’re done now, right?
Not exactly. The final step is to pull the test plug and observe how the water drains.
There are two things that you want to be on the lookout for. These are:
Standing water
For starters, the water should drain completely. The only way to accomplish this is by sloping the waterproofing membrane to the drain.
This is the case no matter how the shower pan was built. Kerdi, Wedi, and traditional shower liners should slope to the drain.
With a traditional water-in/water-out mud pan shower, there is supposed to be a slope underneath the liner. This slope is usually called a “pre-slope,” but sometimes installers try to skip this step and install a liner directly on the flat subfloor. This is incorrect.
Additionally, water shouldn’t collect anywhere before it gets to the drain. When it does, these are often referred to as “birdbaths,” and they will need to be fixed before the shower construction moves forward.
Weep-holes
Clogged weep holes in the shower drain can cause problems down the line. So, you want to ensure they are working when you drain the water from a flood test.
Note: If you have a bonding flange drain, it doesn’t necessarily have weep holes. The most popular example of a bonding flange drain is the Kerdi drain. Also, linear drains typically don’t have a weep system. See my review of the Noble Freestyle Linear Drain.
Every standard tile shower drain, both the 3-piece clamping drain and the cast iron drain, will have a weep system.
Consequently, when the water drains, you want to observe these weepholes draining water—not just some of them, not just a little water. This is an important and often overlooked step.
When is it too late to do a shower pan leak test?
A proper shower pan test will be done when the waterproofing membrane is installed but before the shower construction progresses past this point.
In other words, it should be done before the tile is installed.
It’s not that you can’t perform the same test with the tile installed—plugging the drain and filling it with water—but you won’t be able to monitor the water level accurately.
After it’s filled, the water will likely absorb wherever it can. In the mortar, grout, and mud bed, depending on the type of shower.
So, if you are trying to see if it leaks downstairs or in the crawlspace, this might accomplish that goal.
But if you are trying to see if there’s a slow leak, then I don’t think you’ll be able to perform the test accurately because the water level would probably drop whether it leaks or not.
So, now it won’t leak, right?
Not so fast. A successful flood test proves that your shower may not leak at the moment, but the waterproof membrane could still be damaged.
Additionally, even though the shower pan may sound, it’s common for shower leaks to originate somewhere the water couldn’t test.
Places like the curb, shower benches, and half walls are critical areas that won’t be tested by filling the shower pan with water.
Conclusion
I hope this post has helped explain flood testing, why it’s necessary, and how to conduct one if you are building your own shower.
Please let me know if you have any questions in the comments below.
Frequently Asked Questions about Flood Testing Showers
Kerdi Showers need to be flood tested just like any other shower. Schluter recommends 24 hours.
Some YouTubers claim the Kerdi System won’t pass a flood test. This is inaccurate, and Schluter even recommends you flood-test your showers for 24 hours or more.
Industry standards recommend 24 hours minimum.
The shower pan should be filled with as much water as possible without breaching the top of the curb