It’s time to work on DIY’ing your tile shower and you’re not looking forward to working with the dreaded cement board again. It’s dusty, crumbly, and hard to start screws into. Not to mention how heavy it is.
Sure, there are waterproof foam backer boards on the market but they are extraordinarily expensive. Further, you know you can’t put drywall in a shower. So what to do?
Well, this is an area in which GoBoard is quite compelling: It costs significantly less than other foam backer boards yet is much easier and simpler to install than cement board.
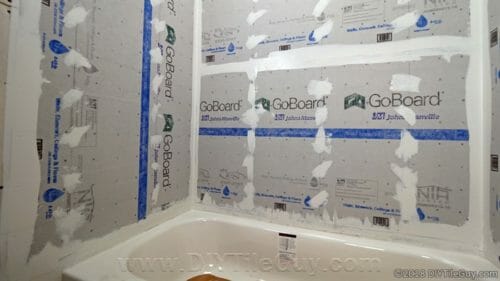
What’s the catch? We’ll get to that. But first…
Johns Manville, the maker of GoBoard Tile Backer Board had originally sponsored this post. Additionally, this post may contain affiliate links. The site owner may earn a commission should you click on an affiliate link and make a purchase. Read more
Estimated reading time: 10 minutes
Table of Contents (click to expand)
What is GoBoard Tile Backer Board?
What is GoBoard?
GoBoard tile backer board is made by Johns Manville and is a waterproof foam board that provides a surface to be tiled over.
It’s similar to other foam backer boards in that it has a foam core with a facing attached to it.
It is waterproof. Of course, you’ll have to seal the seams and penetrations like you would with any backer board. But GoBoard itself is waterproof and doesn’t get additional waterproofing added to it.
Finally, GoBoard backer board can be installed on walls or floors. They make a 1/4-inch thick version, especially for use as a floor tile underlayment.
The Video for How to Install GoBoard Tile Backer Board
Why is GoBoard Tile Backer Board compelling?
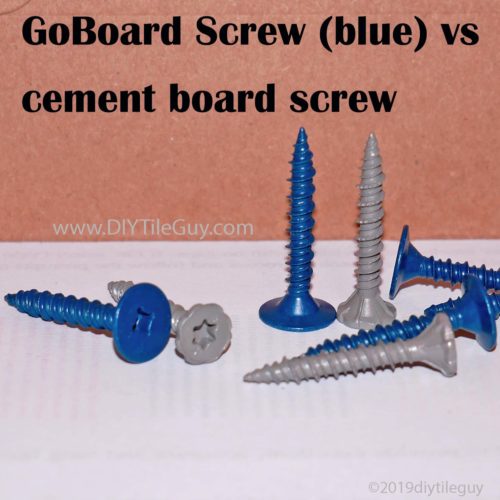
Unlike some of the other popular foam backer boards that require their own brand of special screws and washers, GoBoard is installed with cement board screws or galvanized roofing nails.
edit: GoBoard fasteners are now available and can be spaced every 8 inches as opposed to 6 inches. They are specifically designed for GoBoard with a bigger diameter head for more holding power.
Additionally, each 3ft x 5 ft sheet weighs about 8lbs. Much lighter than 30lb+ weights of cement board.
Because it’s made out of foam it won’t damage the walls in a home as you’re carrying it upstairs which is a common occurrence with cement board.
Then when you factor in the ease of waterproofing, mentioned above, and the cost savings compared to other foam backer boards, you can see how all this adds up to quite a compelling product.
Drawbacks
I see two main drawbacks with GoBoard Tile backer board.
1. A lack of system components.
When I first wrote this post, in 2018, GoBoard was essentially just a backer board. They have since come out with GoBoard shower system as well as many other products. With the GoBoard Wedge system is a way to custom build a shower pan using all GoBoard products.
2. Itchiness
Yes, GoBoard tile backer board is a bit itchy to work with.
Johns Manville is a company that makes building products such as fiberglass insulation. Some of the technology that they’ve developed for their products has gone into the creation of GoBoard.
In the video above, my wearing of long sleeves wasn’t an accident. Long sleeves will help minimize this inconvenience.
2021 update: GoBoard has come out with a new backer board with unique characteristics, one of which is that it doesn’t have the itching issue. However, due to the pandemic and supply shortages, the production of it is on hold for the time being.
How to install GoBoard Tile Backer Board: Two methods
The first method is the way that is outlined by other foam backer board manufacturers. This is where you apply a sealant to every edge prior to installing the backer board.
For example, you would apply a bead of sealant to the top of the tub flange- then install GoBoard over it. Then apply more sealant on top of that sheet and install another sheet on top of it.
The video below demonstrates this method:
In this post, and my video, I’m going to demonstrate the second method: Install all the GoBoard first- then apply all the sealant afterward.
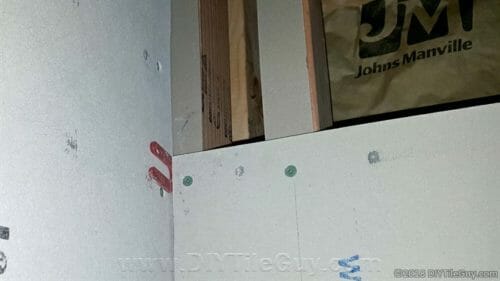
Install First; Seal later
The advantages of installing GoBoard this way are that you’re not constantly going from the sealant to the install.
I like to wear rubber gloves when applying any sealant and I find it preferable to put them on one time and tackle the goopy part all at once.
However, the critical aspect of this is to make sure that you leave a 1/8 inch gap everywhere that you will need to apply GoBoard sealant. Without leaving a gap it’s likely your installation won’t be waterproof.
Tools needed to install GoBoard:
- caulk gun
- cement board screws (or roofing nails or other approved fasteners)
- putty knife
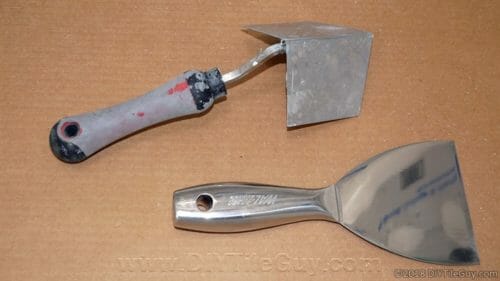
- corner tool (drywall type)
- tool to install fasteners (impact driver, hammer, or ?)
- razor knife
- straight edge for cutting
- denatured alcohol (for cleanup)
And, of course, GoBoard backer board and GoBoard Sealant.
For a list of alternate sealants, please scroll to the bottom of this post.
Before you begin:
Check your framing
You want to make sure that the wall framing meets minimum standards. These include:
- 16 inches on center
- blocking around the base of tub or shower
- All vertical seams and edges supported
Installing GoBoard Tile Backer Board
I was installing the walls around an alcove tub. Since a standard tub is 60-inches wide I don’t think it’s a coincidence that tile backer boards come 60-inches in length.
For the back wall, I laid the panels sideways so they were 36-inches tall. The side walls I installed vertically.
Typically, the back wall pieces get installed first then the sides though this isn’t a hard and fast rule.
How to Cut GoBoard
Cutting GoBoard is a breeze.
For straight cuts, a simple razor knife and straight edge are all that’s needed. It really is this simple:
- Score through the top facing
- Break the panel along this score point
- Snap it back in the opposite direction
The panel will break right off with very little strength needed.
For rounded or angle cuts:
You’ll have to use a razor knife and cut all the way through the board
Fastening GoBoard Tile Backer Board
To fasten GoBoard to the wall you can use:
- GoBoard fasteners (can be spaced at 8 inches)
- Cement board screws
- Galvanized roofing nails
- Staples (consult manufacturer’s data sheet for correct type)
I much prefer screws although they are probably the most time-consuming of the choices listed above. Since it’s easy to drive the screws too deep you’ll have to be careful about how far the screws are installed.
If the screws aren’t screwed in far enough then they will interfere with the sealant and you could compromise the waterproofing of the panels.
If they are driven too far in then they won’t have the holding power.
Screws should be installed on the studs every 6 inches and within 1/2 inch of every edge.
Gaps between the board
You’ll want to make sure that there’s a 1/8 inch gap between all Goboard seams. This includes between Goboard and the tub (or shower) flange and also the vertical corner seams. This will allow the sealant to get in between these two points.
Applying GoBoard Sealant
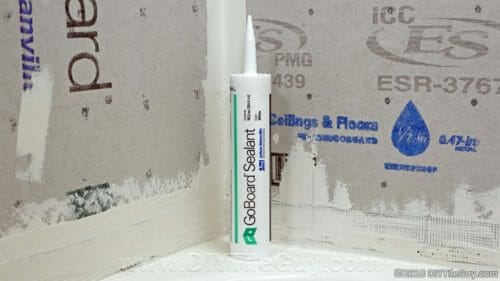
GoBoard makes their own sealant for their Goboard panels. It comes in standard 10.3 oz caulk tubes and is applied with a caulk gun.
Cut the tip of the caulk tube off at an angle. The hole in the tube should be small enough to fit in between the 1/8 inch gap. Don’t forget that there’s an inner seal in the neck of the tube and this will need to be stabbed with a metal wire (often included, but not always, on caulk guns).
The sealant will be put into every gap around the panels. Every panel installed should have a 1/8 inch space all around it.
Two passes
I recommend that GoBoard sealant is applied in two different passes.
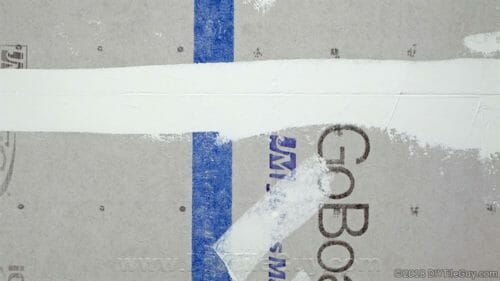
The first attempt should be to concentrate on getting sealant into the gap. Then flatten the sealant with your putty knife.
The second pass is to apply more sealant on top of the sealant from the first pass. Again, flatten with a putty knife, only this time make sure there is 1 inch of sealant on both sides of the seam.
Make sure to get the sealant flattened and smooth so that it will be a flat surface to tile over.
Corners
Applying the sealant in the corners is the same process as above. The one difference is that instead of using a flat putty knife to smooth you would use the corner tool instead.
Tub or shower flange
This post covers the two main ways of sealing the bathtub flange for tile surround. GoBoard makes a banding that will work if you don’t shim your walls past the flange.
Clean up and final steps
I found that the sealant cleans up with denatured alcohol. You can use this around the tub or shower also to clean the GoBoard sealant off.
When you are complete, make sure to check for pinholes and voids.
Once GoBoard tile backer board is installed and the sealant has dried you are then ready to install tile.
For more information, including technical and safety data, please visit GoBoard’s website.
What if I can’t find GoBoard Sealant in my area?
Some people have mentioned that they have found GoBoard Sealant difficult to locate. If you are unable to purchase this sealant GoBoard has an alternate sealant list on their website available to download.
Below is a list of the sealants that were listed at the time of this edit (early 2020). You should always check their website for the most current list.
GoBoard Alternate Sealant list
- DAP 3.0 (model 18360)
- KBRS ShowerSeal Polyurethane Sealant
- Liquid Nails Fuze-It (model LN-2000)
- LOCTITE PL S10 Polyurethane Concrete Crack & Masonry Sealant (model 1618522, 1618521 or 1086693)
- LOCTITE PL S40 Polyurethane Window, Door and Siding Sealant (model 1618516 or 1618182)
- OSI QuadMax Window, Door & Siding Sealant (model 1868684 or 1893977)
- QUIKRETE Polyurethane Non-Sag Sealant (model 866011 or 862017)
- SikaBond Construction Adhesive (model 106403)
- White Lightning Optima White Premium Hybrid Sealant (model W31200010)
- DAP DynaFlex 800 (model 80800
- Rapid Set Sealant (model 196330010)
They mentioned that other sealants may work but to stay away from self-leveling, silicone, and latex-based sealants. More information about caulk vs sealant.
Updates
GoBoard is coming out with new products all the time.
- Sealant is much more available and offers a 10-year warranty
- Same with the screws (which now have Torx heads)
- Seam fabric
- Shower pan wedge system
- Board spacers (see video below)