Yes, tile herringbone patterns look great. But how do you get started with them?
This post will cover these three things:
- A super simple way to get started
- How to layout and properly center a herringbone pattern
- Modular vs non-modular tile patterns
First, I’m going to assume you are using modular tile. More on this towards the end of the post.
Estimated reading time: 6 minutes

A simple way to get started installing a herringbone tile pattern
Here is a simple way of getting started with two different kinds of tile:
Both patterns are modular. We’ll start with the subway tile
How to start a subway tile herringbone pattern
For this example, I’m using standard 3×6 subway tile. These are Daltile Restore and sold exclusively through Home Depot. However, you will find similar tiles at other box stores.
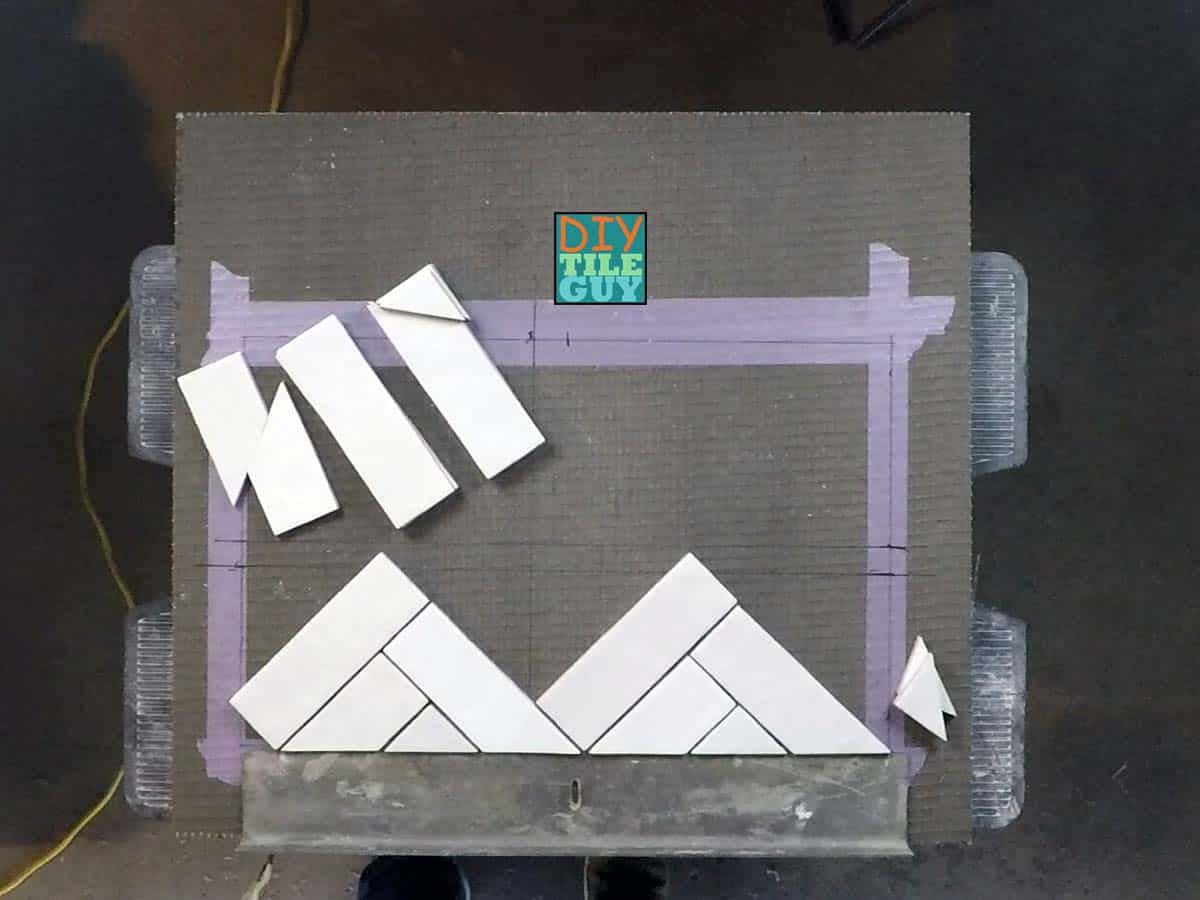
- Cut the points off some of the tiles
Get started by cutting the points off of one end of the subway tiles at a 45 degree angle.
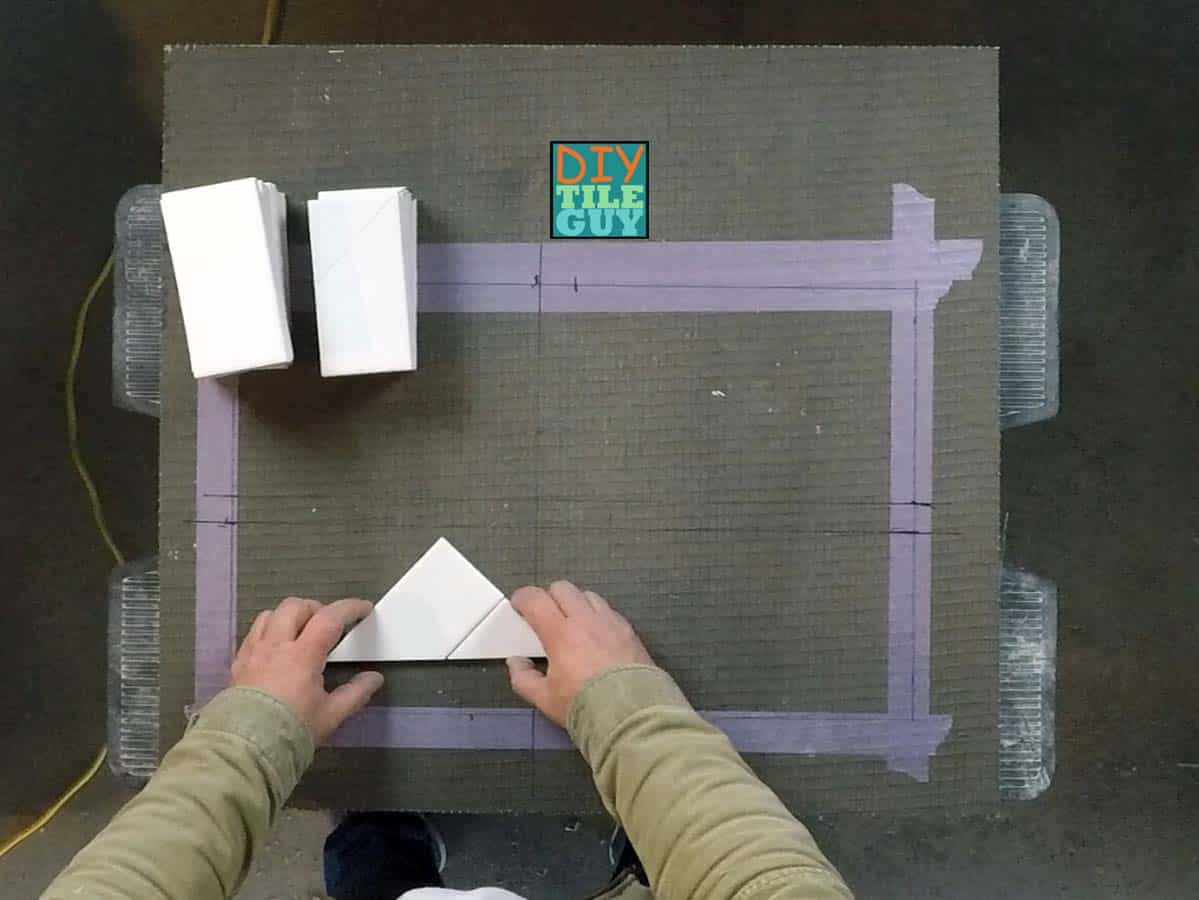
- Make a triangle
Take both pieces of the tile that you just cut and combine them so they form a triangle
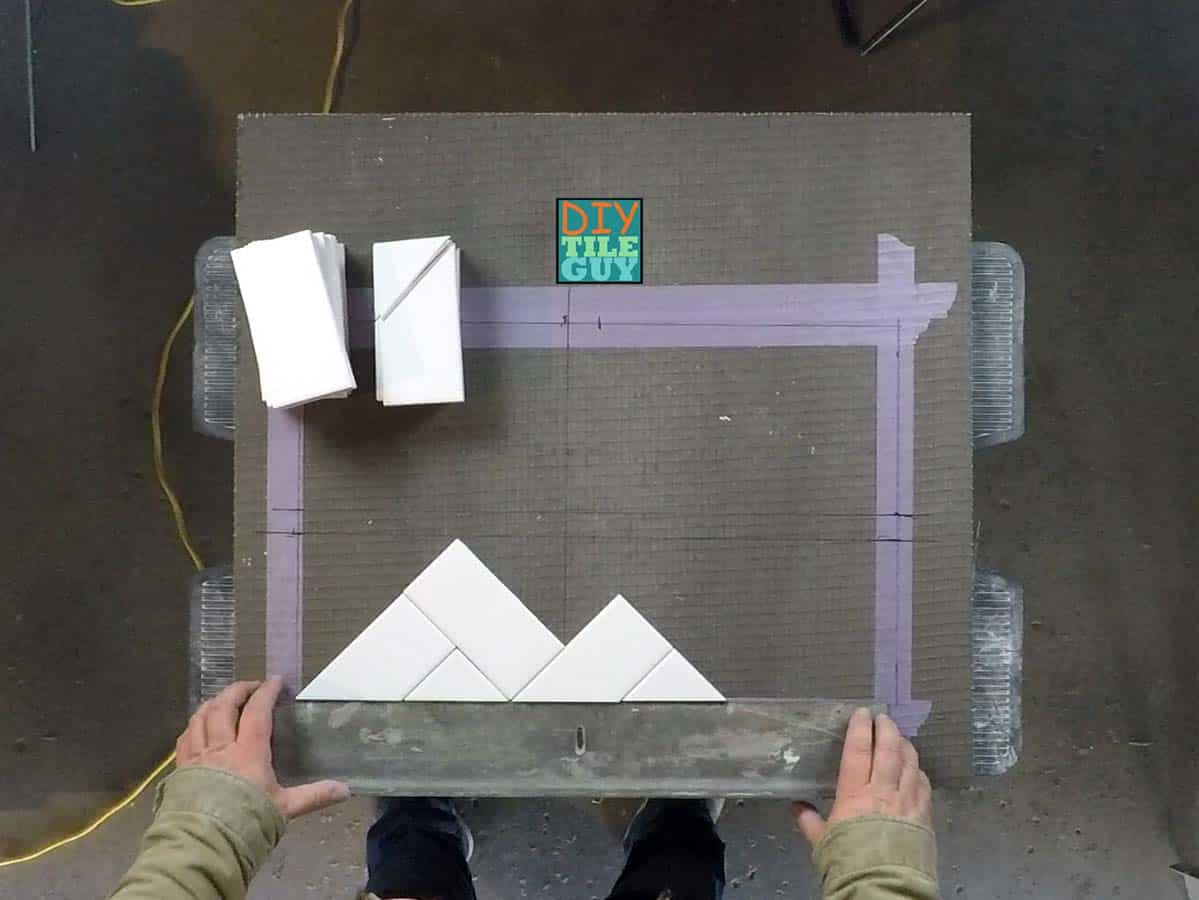
- Repeat step 2 and put the triangle side-by-side
Put both triangle next to each other so the bottoms are on a straight line
- Fill in with field tile
Fill the space in-between the triangle with full tiles.
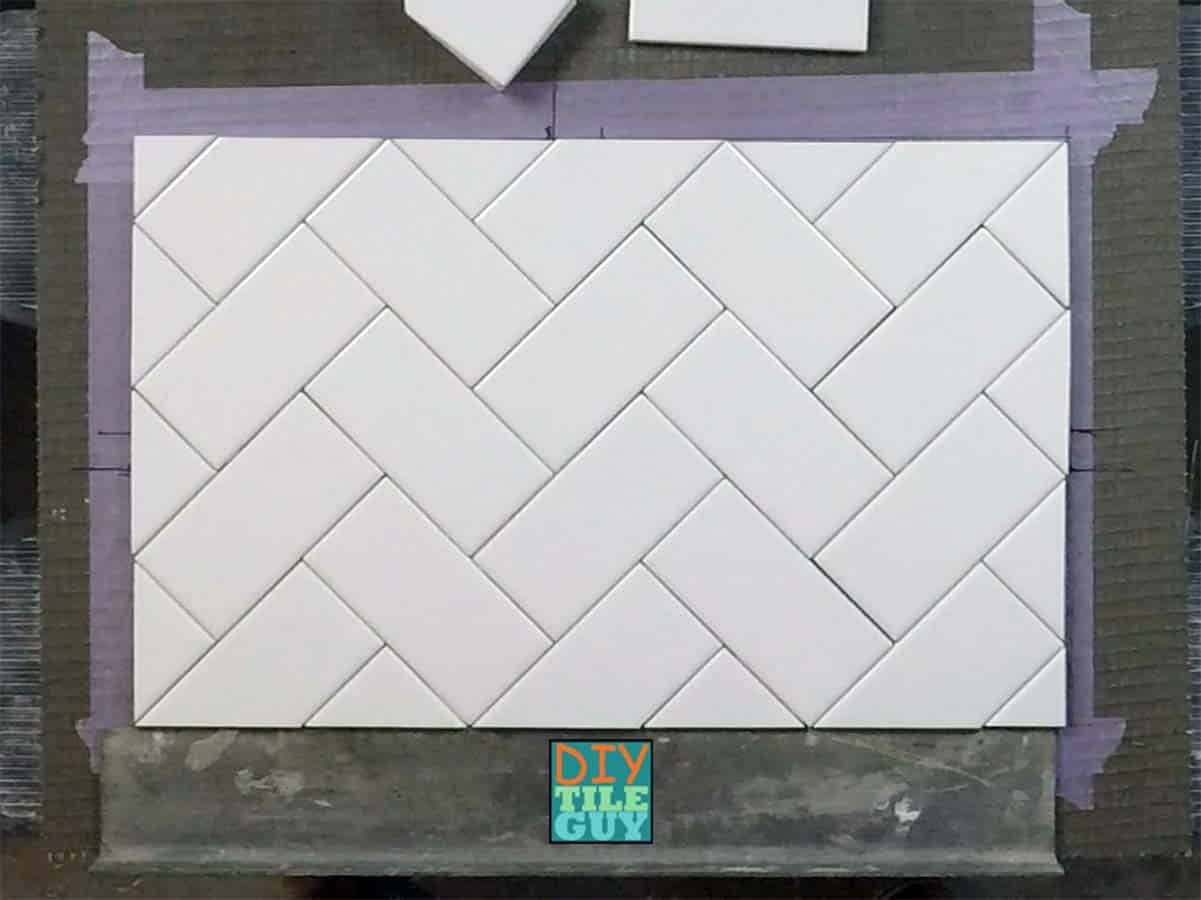
- Repeat this process as necessary to fill the space
Keep making triangle and filling in the space until you need to make more cuts
- Cut in the perimeter
Cut in any tiles around the perimeter to fit the space
Herringbone pattern with longer rectangular tile
The process for installing the Bedrosians Cloe tiles is the same as above with one additional step:
- Step 1.5) Cut some tiles in half at a 45-degree angle
- Step 2) Add one of the half pieces to make each triangle
Again, it works out this way because both of these lines of tile are modular.
Video of how to start a herringbone tile pattern
Here’s a 4-minute video where I show how to get started with a herringbone pattern with both tiles that I mentioned above.
This process above is appropriate when you have a definite starting point. For example, a kitchen backsplash where you start the herringbone pattern off of the countertop and cut tiles in to the cabinets above.
Other times, you’ll want to center the herringbone tile pattern in a space.
Centering a herringbone tile pattern
There’s something that you need to know about centering a herringbone pattern.
The center isn’t obvious.
The herringbone center doesn’t line up with the points. In fact, it’s in between the points. The image below demonstrates this.
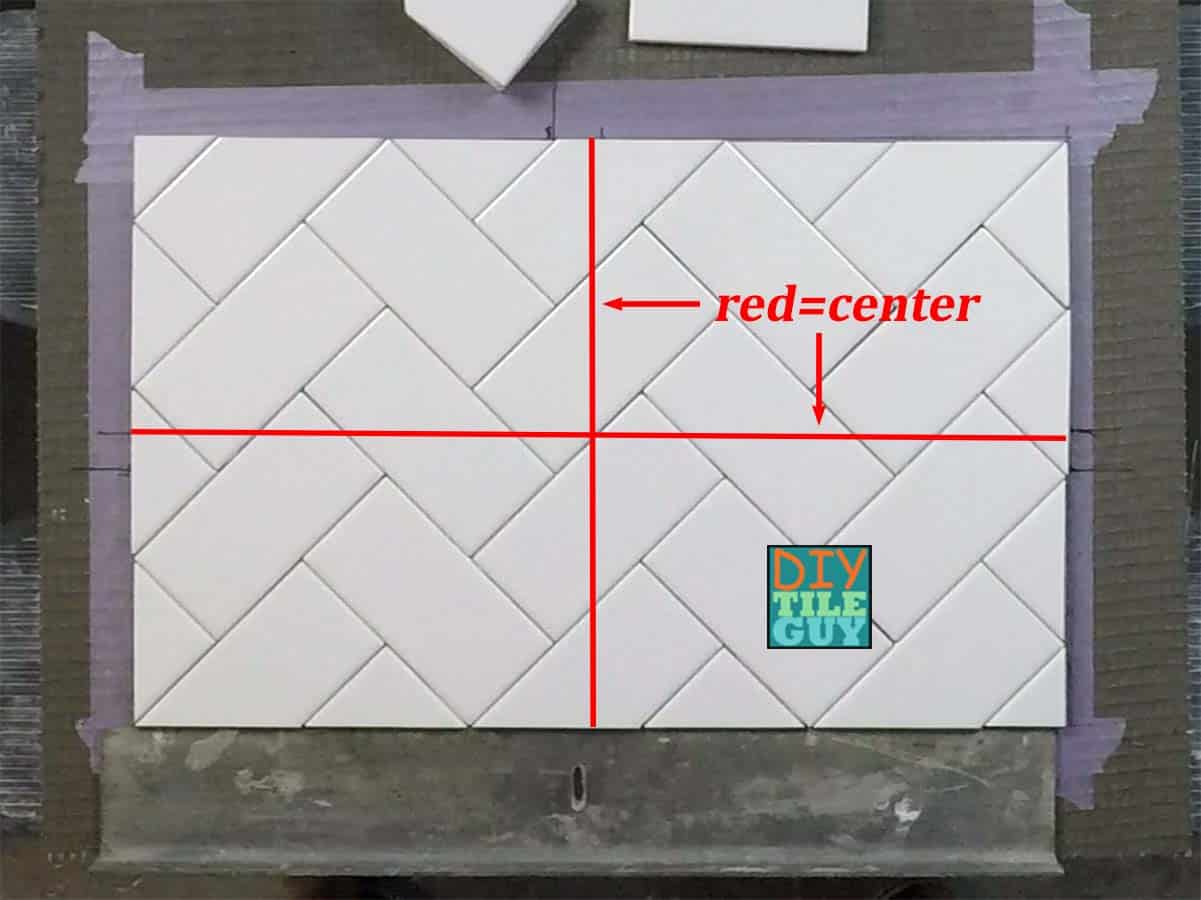
Finding your center
The center is between where the two points overlap. This is true if you are centering the pattern vertically or horizontally.
Figure out where the center of your space is. Is it between two walls? Is it centered between the floor and ceiling? The center of a floor?
Mark the center of the space then line the center of the herringbone pattern up with it.
Herringbone layout lines
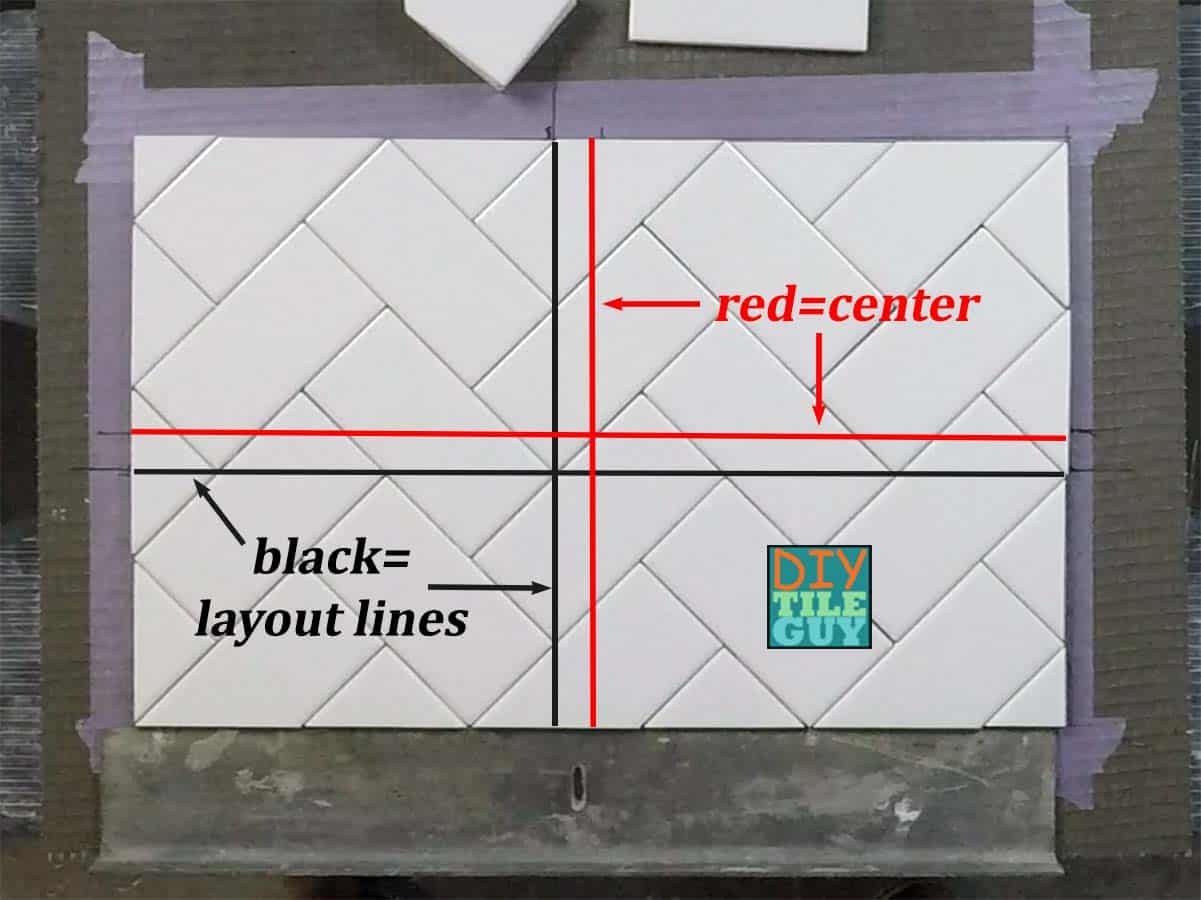
When it comes to installing the tiles in the herringbone pattern, it’s much easier to line up the points of the tile on a line than it is to try to lay the tiles perfectly on the center line.
Because of this, my recommendation is to mark separate layout lines that align with the points of the tile and use those as a guide to set your tile.
Modular vs non-modular tiles
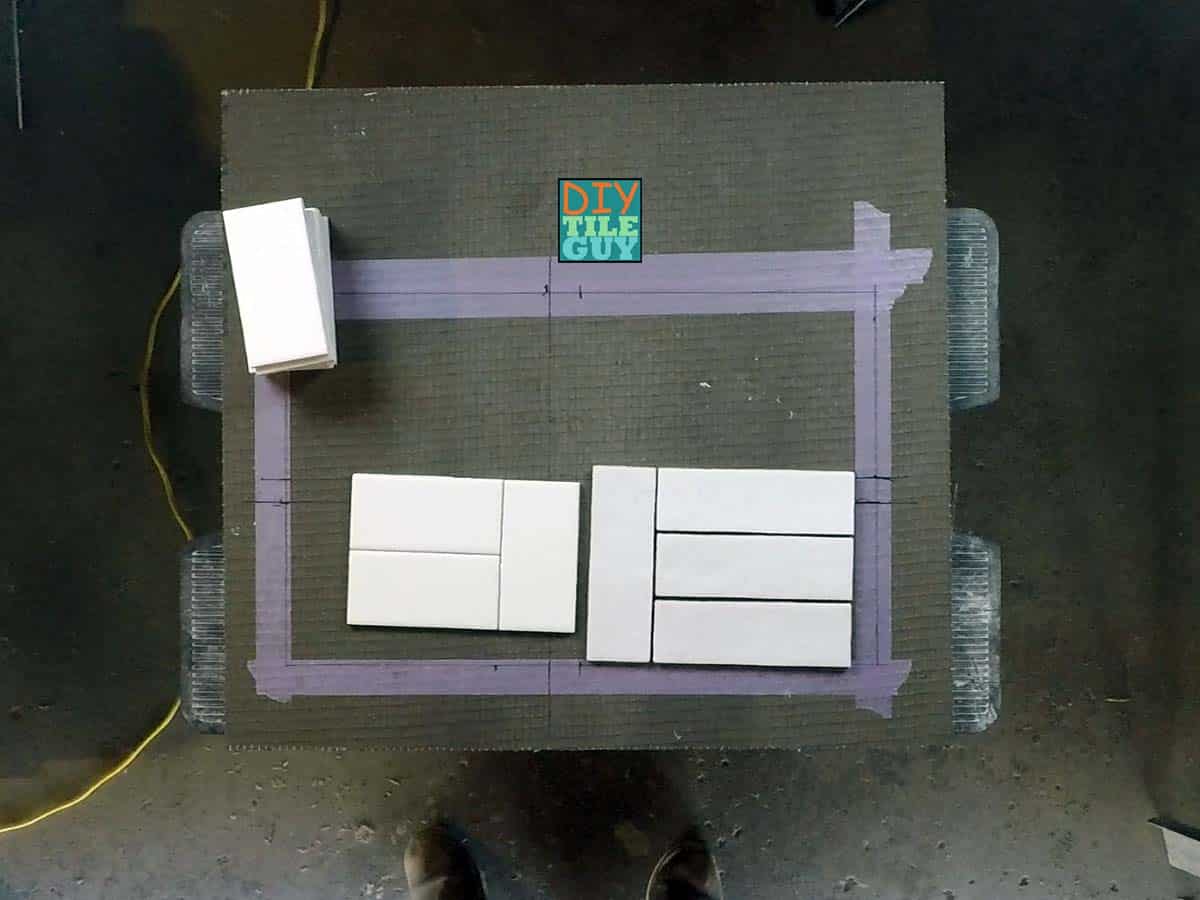
Modular tiles are made in such a way that different sizes of tile can be mixed and matched to make different patterns.
It’s not required that tiles be modular even if they are from the same line of tile made by the same manufacturer.
If your tiles are not modular then you have a limited number of patterns you can arrange them in.
You can check if your tiles are modular by laying them out like below.
Can you make a herringbone pattern out of non-modular tile?
Yes, you can lay a herringbone tile pattern with non-modular tiles but you will have to figure out what the cuts will be. They are going to be different for each tile.
With the Cloe tile above, the cuts are on the points and exactly in half. With a non-modular tile they won’t be exactly in half.
You’ll have to assemble the starting triangles and determine where to make the cuts so they are even. However, the whole bottom row should have the same, repeating cuts.
Remember to always figure more tile than normal when calculating your square footage with a herringbone pattern.
This post has even more subway tile layout techniques.
Leave a Reply